
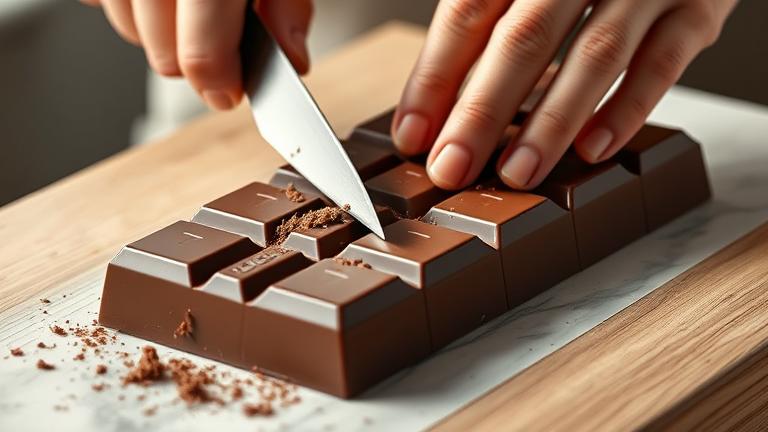
Essential Tools for Cutting Chocolate
When working with chocolate, having the right tools is key to getting clean, precise cuts without cracking or crumbling. Whether you’re preparing chocolate for decorating, slicing into bars, or creating delicate shapes, the right equipment makes all the difference.
Start with the basics: good-quality knives. A sharp chef’s knife or a serrated bread knife are popular choices for cutting chocolate. A sharp knife helps you make smooth cuts, reducing the risk of breaking the chocolate. Always ensure your knife is clean and sharp before you start.
For more detailed or intricate shapes, consider using a bench scraper or a chocolate knife. These tools give you better control and can help create clean, straight edges. Some cooks prefer a hot knife, which isn’t actually heated but dipped in warm water and wiped dry before cutting. This makes slicing easier because the warm blade glides through the chocolate smoothly.
Specialized Equipment for Perfect Cuts
- Chocolate Cutter or Wire: These are thin wires stretched in a frame, perfect for slicing through large blocks or slabs of chocolate evenly. They give you straight, uniform pieces without breaking the chocolate apart.
- Warmers and Heating Tools: A chocolate warmer or hot plate can be used to slightly soften the chocolate at the edges, making cutting easier. Be careful not to overheat or melt the chocolate completely.
- Temperature-controlled spatulas or scrapers: Heating tools that help keep your chocolate at the right consistency, making it less brittle and easier to cut cleanly.
Additional Tips for Cutting Chocolate
- Chill the chocolate before cutting. Refrigerate the block for about 30 minutes to firm it up. Firmer chocolate reduces the risk of crumbling during slicing.
- Use a ruler or straight edge if you need perfectly straight lines. Place it on the chocolate and run your knife along it for an even cut.
- Make steady, even pressure. Avoid pressing too hard, which can cause the chocolate to crack or break.
- For very delicate chocolates, consider using a hot wire cutter. This specialized tool melts a thin wire that cuts through chocolate with minimal pressure.
Safety and Maintenance
Always be cautious when handling sharp knives or hot tools. Keep your blades clean and dry after use to prevent rust and maintain their sharpness. When using heated tools, allow them to cool down properly before storing. Proper maintenance ensures your tools stay in good condition and provide consistent results every time.
With the right tools and a little practice, you’ll achieve beautifully cut chocolate that looks just as good as it tastes. Remember, a sharp knife, some patience, and a gentle touch are your best friends in chocolate cutting.
Best Techniques for Smooth Cuts
Achieving smooth and even chocolate cuts can be tricky, but with the right techniques, you’ll get perfect slices every time. Whether you’re slicing a block of tempered chocolate or delicate ganache, the key is using proper tools and methods.
First, choose the right tools. A sharp, clean chef’s knife or a specialized chocolate cutter can make a big difference. A dull blade crushes instead of cuts, resulting in uneven edges. For softer chocolates, a heated knife can help glide through smoothly without cracking.
Once you have your tools ready, pay attention to your cutting angle. Hold the knife at a 45-degree angle to the surface of the chocolate. This gentle tilt helps create a clean line and minimizes cracking or tearing. Avoid pressing straight down, which can cause jagged edges.
Next, focus on applying steady pressure. Use gentle, consistent pressure rather than pushing hard. If the chocolate resists, gently wiggle the knife back and forth instead of forcing it through. This technique reduces breakage and promotes a smoother cut.
Temperature plays an important role. For firm, tempered chocolates, ensure they are at room temperature or slightly cooler before cutting. If they are too warm, they may melt or smear. If they are too cold, they might crack. For softer chocolates like ganache, chill them slightly before slicing for cleaner results.
For precision cuts, it helps to mark your chocolate lightly with a toothpick or a butter knife before making the full cut. This creates a guide to follow, especially for intricate designs or straight lines.
Using Proper Cutting Techniques
- Plan your cuts: Think ahead about where each slice should go. Use a ruler or a straight edge for guidance if needed.
- Slow and steady: Take your time. Rushing can cause uneven or jagged edges.
- Use a sawing motion: Gentle back-and-forth movements help cut through the chocolate smoothly.
Lastly, clean your knife after each cut to prevent buildup that can cause uneven edges. Wipe it with a warm, damp cloth and dry thoroughly before the next slicing. With these techniques, you’ll master the art of smooth, even chocolate cuts that are as beautiful as they are delicious.
Handling Different Types of Chocolate
Working with various types of chocolate can seem tricky at first, but with a few simple tips, you can handle each type confidently. Whether you are dealing with soft, tempered, or hard chocolate, understanding their unique qualities helps prevent common problems like melting, cracking, or sticking. This way, you get clean cuts and beautiful finished treats every time.
Soft Chocolate
Soft chocolate includes varieties like melting wafers or chocolate melts used for coating or dip. These chocolates are more sensitive to heat and can become sticky or melt easily. When handling soft chocolate, it’s best to work in a cool, dry environment.
- Always melt soft chocolate gently using a double boiler or microwave in short bursts. Overheating can cause it to seize or become grainy.
- For dipping or coating, use a fork or skewer to handle pieces. To avoid melting your hands’ heat, consider wearing gloves or using tongs.
- If soft chocolate becomes too runny, let it cool slightly before working with it, or add a small amount of solid chocolate to thicken it up.
- To prevent sticking, dust surfaces with a little powdered sugar or cornstarch if needed.
Tempered Chocolate
Tempered chocolate is carefully heated and cooled to give it a shiny finish and a firm snap. It’s ideal for coating, shell forming, or decorations. Proper tempering is key to working with this chocolate type.
- Always keep tempered chocolate at the right temperature: around 88–91°F (31–33°C). Use a thermometer to monitor.
- Use a clean, dry spatula and work on a cool surface to avoid premature melting.
- When pouring or spreading tempered chocolate, do it quickly but gently to maintain its shine and structure.
- To cut tempered chocolate, let it set fully at room temperature or in the fridge for a few minutes. Use a sharp knife, wiping it clean between cuts for neat edges.
Hard Chocolate
Hard chocolate, like solid chocolate bars, is perfect when you want to create sharp, precise cuts or chiseled decorations. Its firm texture allows for easy handling once it’s properly set.
- Chill hard chocolate in the refrigerator for about 30 minutes before cutting. This enhances its firmness.
- Use a sharp, serrated knife for cleaner cuts. Wipe the blade clean between cuts to avoid sticking or smudges.
- If the chocolate begins to warm and soften during cutting, re-chill it briefly.
- For intricate shapes, consider using molds or carving tools while the chocolate is just firm enough to hold shape.
Additional Tips for All Types
- Protect your workspace with parchment paper or silicone mats to catch drips and crumbs.
- Handle chocolate with clean, dry hands to prevent condensation or fingerprints from marbling or dulling the finish.
- Store chocolate properly: keep it in a cool, dark place away from direct sunlight and moisture. Hard or tempered chocolates can be stored at room temperature, soft chocolates should be refrigerated if needed.
Step-by-Step Cutting Guide
Cutting chocolate might seem simple, but doing it well ensures your pieces look neat and presentable. Whether you’re preparing for a dessert topping or a gift, following these practical steps will help you achieve consistent results every time.
Before you start, gather all your tools. A sharp chef’s knife or a serrated bread knife works best for cutting chocolate. You’ll also want a clean, flat cutting surface and some parchment paper or a cutting board. Keep in mind that chilled chocolate is easier to cut cleanly because it firms up and reduces melting.
1. Prepare the Chocolate
First, ensure the chocolate is properly tempered or at least cooled, especially if you plan to serve it immediately. If the chocolate is melted or soft, place it in the refrigerator for about 15 to 20 minutes until it hardens. This makes cutting smoother and prevents uneven edges.
2. Mark Your Cutting Lines
Use a ruler or measuring tape if you want precise, uniform pieces. Lightly score the chocolate’s surface with the tip of your knife or a toothpick where you plan to cut. This helps guide your knife and reduces cracks or uneven breaks.
3. Start Cutting Gently
Place the chocolate on your cutting surface. Use a gentle, steady motion to cut along your scored lines. Don’t press too hard; instead, let the sharpness of your knife do the work. If the chocolate is thick, work slowly and in stages to avoid breaking or cracking.
4. Use the Right Technique
- For clean straight cuts, hold the knife perpendicular to the chocolate, pressing down firmly and evenly.
- If the chocolate is large or thick, cut from one side to the other in a rocking motion, keeping the knife steady.
- When cutting fragile or thin pieces, try using a sawing motion to prevent breakage.
5. Handle the Pieces with Care
Once cut, gently transfer the chocolate pieces to a plate or tray. Use a flat, wide spatula or a small offset spatula to lift delicate pieces without breaking them. Be patient and avoid rushing; this helps maintain the shape and appearance.
6. Final Touches
If the edges look a little rough, you can gently go over them with a warm knife to smooth out any jagged spots. Just warming the blade slightly helps melt away rough edges for a cleaner look. Store the cut chocolate in a cool, dry place until you’re ready to serve or decorate your desserts.
- Tip: For extremely neat pieces, freeze the chocolate for 10 minutes before cutting. This firms it up even more and reduces smudging or melting.
- Tip: Always use a sharp knife. Dull blades can crush or chip the chocolate, making cleanup harder and resulting in uneven pieces.
- Mistake to avoid: Rushing the process or pressing too hard can cause breakage or uneven cuts.
With these friendly tips and practical steps, cutting chocolate will become a simple, satisfying part of your baking process. The key is patience and a steady hand. Happy baking!
Tips for Clean and Safe Cuts
When working with food, especially items like chocolate that can be tricky to cut smoothly, safety and cleanliness are key. Proper techniques help you achieve neat edges and avoid accidents in the kitchen. Here are some friendly, practical tips to help you cut safely and efficiently.
First, always start with a clean workspace and tools. Wash your knives, cutting boards, and countertops thoroughly before you begin. This prevents cross-contamination and keeps your food safe to eat. Using a sharp knife is also important. A dull knife requires more force, increasing the risk of slips and cuts. Keep your knives sharp and well-maintained for precise, safe cuts.
Next, make sure your cutting surface is stable. Use a damp towel or non-slip mat under your cutting board to keep it from sliding around. A steady surface allows for more control and reduces the chance of accidents. When handling chocolate, it’s helpful to work with a clean, flat surface that is cool and not too greasy. This prevents the chocolate from melting or sticking too much.
Now, for the actual cutting tips: always hold the item firmly but gently. When cutting chocolate, use a gentle sawing motion rather than pressing down hard. This gives you greater control and produces cleaner edges. If you’re cutting large or thick pieces, consider slicing them into smaller sections first. This makes each cut easier and safer.
Another practical tip when working with chocolate is to lightly warm the knife blade before cutting. Warmth helps the knife glide through the chocolate more smoothly, resulting in cleaner slices. Just dip the knife in warm water, wipe it dry, and then proceed. Be careful not to make the knife too hot, as it could deform or melt the chocolate.
Additionally, use guide marks or rulers for precise cuts, especially if you need evenly sized pieces. Mark your chocolate with a gentle line or use a ruler to ensure straight, consistent edges. Taking your time and making deliberate, gentle cuts often results in the best appearance and safety.
Some common mistakes to avoid include rushing the process or applying too much force, which can lead to slips, cuts, or broken pieces. Never try to cut through items that are frozen or too hard without proper tools or warming. For example, snapping chocolate into smaller parts with your hands might create jagged edges or cause pieces to fly, which is unsafe. Instead, cut carefully with your knife or use a heated blade for best results.
Finally, after finishing your cuts, clean your tools immediately. Residue can cause sticky, unsafe conditions if left on knives or boards. Proper cleaning and drying prolong tool life and keep your workspace safe and tidy.
- Maintain sharp knives for safer, cleaner cuts.
- Ensure your workspace and tools are clean and stable.
- Use gentle, controlled motions to cut food safely.
- Work with warm, not hot, blades when cutting chocolate.
- Avoid rushing or applying excessive force to prevent accidents.
Common Mistakes and Troubleshooting
Cutting chocolate might seem simple, but it can be tricky if you’re not careful. Many home cooks encounter common errors that can affect the appearance and texture of their chocolate pieces. Luckily, with a few tips and solutions, you can avoid these mistakes and achieve smooth, clean cuts every time.
The most frequent mistake is rushing the process. Trying to cut chocolate too soon after melting or tempering can cause it to crack or crumble. Make sure the chocolate has cooled and set completely before slicing. Usually, chilling the chocolate in the fridge for about 30 minutes helps it harden enough for clean cuts.
1. Using a Dull Knife or Improper Cutting Tools
A dull knife is a common culprit behind uneven or jagged edges. When the blade isn’t sharp, it tears through the chocolate instead of slicing smoothly. This can lead to cracks or misshapen pieces.
Always use a sharp, serrated or chef’s knife. Warm the knife slightly by running it under hot water, then dry it thoroughly. A warm blade softens the cut and reduces the risk of cracking, resulting in cleaner, more professional-looking pieces.
2. Not Using Proper Temperature Control
Chocolate that is too warm is soft and prone to breaking apart instead of cleanly slicing. Conversely, if it’s too cold, it can become brittle and crack easily. Achieving the right temperature is key.
To troubleshoot, ensure your chocolate is at the right consistency. If it’s been stored in the fridge, let it sit at room temperature for a few minutes beforehand. When working with tempered chocolate, make sure it stays at the ideal working temperature, usually between 86 and 88 degrees Fahrenheit (30-31 degrees Celsius).
3. Cutting Too Early or Too Late
Timing matters. Cutting chocolate before it has fully set can cause it to smudge or lose shape. Waiting too long can make it brittle and prone to shattering.
A good rule of thumb is to wait until the chocolate feels firm but not frozen. If you’re unsure, gently press the surface; if it’s firm to the touch and doesn’t dent, it’s ready to cut.
4. Applying Excessive Pressure
Applying too much force when cutting can crush or chip the chocolate. Use a gentle, steady pressure and let the blade do the work. If you notice resistance or cracking, slow down and adjust your technique.
Tips for Better Results
- Chill the chocolate in the fridge for 30 minutes before cutting.
- Use a warm, sharp knife for precise slices.
- Cut in a straight, smooth motion without pressing down too hard.
- Work in a cool, dry environment to prevent melting or sweating.
- For very neat edges, you can run the knife under hot water frequently, then dry it lightly before each cut.
By avoiding these common mistakes and following the troubleshooting tips, your chocolate will look better, break more cleanly, and be much easier to work with. Patience and proper technique are your best tools for perfect chocolate cuts every time.
Creative Ideas for Serving Chocolate
Chocolate is a versatile treat that can be served in many beautiful and unexpected ways. Whether you’re presenting squares, shards, or delicate truffles, creative plating and pairing can turn a simple piece of chocolate into a stunning dessert experience. Here are some practical tips and ideas to make your chocolate presentation truly stand out.
Start by thinking about the overall look you want to create. A neat, modern display might favor clean lines and minimal garnishes, while a festive presentation could include colorful fruits and decorative elements. Whatever the style, the goal is to make the chocolate look tempting and appealing.
Decorative Plating Tips
- Use contrasting colors: Place dark chocolate on a white plate or alongside bright fruits like strawberries or orange slices to enhance the visual appeal.
- Add edible decorations: Sprinkles, chopped nuts, or edible gold leaf can add a touch of elegance and texture.
- Play with shapes and arrangements: Cut chocolate into interesting shapes like hearts or stars, or arrange squares in a spiral or fan for a dynamic look.
Pairing Options for Enhancing Flavor
Chocolate pairs beautifully with many other ingredients. Creating a pairing board or serving small tasting plates can elevate your chocolate experience. Here are some ideas:
- Fruits: Strawberries, raspberries, orange zest, or sliced bananas.
- Cheese: Mild cheeses like Brie or Camembert complement milk chocolate, while stronger cheeses go well with dark chocolate.
- Accents: A drizzle of caramel or honey, a sprinkle of sea salt, or a dash of chili flakes can add interesting flavor contrasts.
Presentation Tips for Maximum Appeal
- Use serving platters: Arrange chocolates in small piles or geometric patterns on a clean, elegant platter.
- Layer with garnishes: Place chocolates among edible flowers, mint leaves, or small bowls of dips like chocolate sauce or yogurt.
- Consider height and dimension: Use stands or small elevated dishes for a multi-level display that catches the eye.
Creative Display Ideas
- Chocolate tasting station: Set up a variety of chocolate types and accompaniments for guests to sample and compare.
- Themed presentations: For holidays or special occasions, decorate the serving area with themed items like tiny Christmas trees or heart-shaped tags.
- Interactive setups: Allow guests to build their own chocolate sundaes or dips right at the table.
Remember, the key to an appealing presentation is about balancing beauty with fun. Play with colors, shapes, and textures, and most importantly, have fun experimenting with different combinations. Your creative display will not only make your chocolates irresistible but also create a memorable treat for everyone to enjoy.