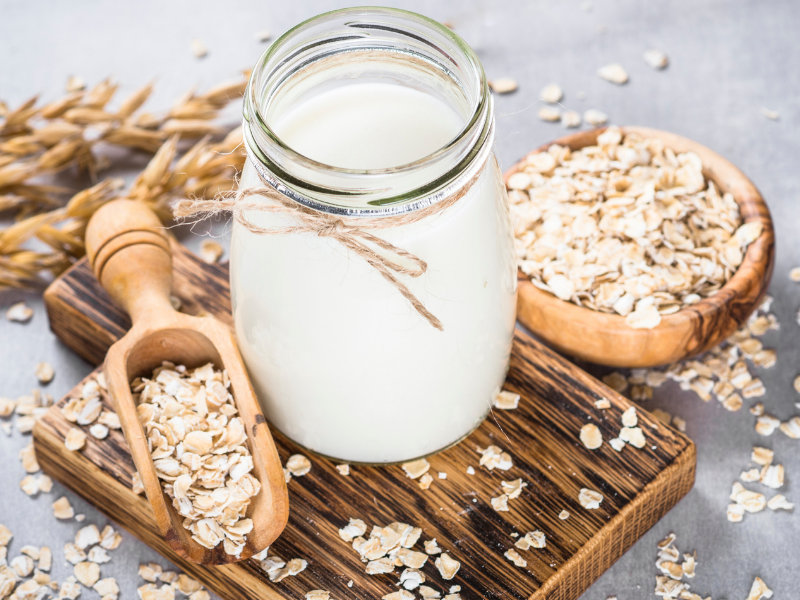
How to Make Oat Milk (Without a Cheesecloth)

Did you know oat milk has been one of the fastest-growing dairy alternatives worldwide? It’s no secret why—its creamy texture, mild flavor, and plant-based goodness make it a favorite for so many people, whether you’re vegan, lactose intolerant, or just looking for something new. But here’s the thing: the oat milk you buy at the store often comes with a long list of ingredients you can’t pronounce, and sometimes the price tag feels a little steep for what’s basically oat and water.

So I decided to try making my own oat milk at home. The only problem? I didn’t have a cheesecloth. I thought, “How am I supposed to strain all that oat pulp without it?” But it turns out, there are tons of ways to get around that. After some trial and error, I found out you don’t really need fancy gear—just a bit of creativity and some common kitchen stuff.

If you want to save money, avoid additives, and have fun experimenting with flavors, making oat milk yourself is totally worth it. Plus, it’s surprisingly quick and easy. In this post, I’ll walk you through everything you need to know to make delicious oat milk without a cheesecloth. Let’s get started!

Why Make Oat Milk at Home?

When I first thought about making oat milk at home, I figured it would be complicated or require a lot of special equipment. But once I gave it a try, I realized it’s actually super simple and has a bunch of perks over buying it ready-made. Here’s why making your own oat milk is worth the effort.

Freshness and Quality Control

One of the biggest reasons I switched to homemade oat milk was because I wanted to control exactly what was going into my milk. Store-bought versions often contain added sugars, stabilizers, preservatives, and sometimes oils or emulsifiers that I didn’t want in my diet. When you make oat milk yourself, you get to choose fresh, simple ingredients. It’s just oats, water, and any flavorings you add.

Freshly made oat milk tastes noticeably better to me—creamier and less processed. Plus, it’s free from preservatives, so it feels healthier.

Cost Savings

Here’s the thing: oat milk can get expensive. At the grocery store, a quart can cost anywhere from $3 to $5 depending on the brand. When I figured out I could make oat milk at home for less than 50 cents a quart, it was a game changer. Buying oats in bulk is cheap, and water is basically free, so the math works out well.

If you drink a lot of oat milk, homemade really adds up to significant savings over time.

Environmental Impact

I’m also someone who cares about the planet, so I was excited that making oat milk at home means less plastic waste. Those cartons you get at the store contribute to packaging waste, even if they’re recyclable. By using reusable glass bottles or jars at home, you cut down on single-use packaging.

Plus, oats themselves have a lower environmental footprint compared to dairy or other nut milks, so homemade oat milk is a nice sustainable option.

Customizable Texture and Flavor

Another cool thing? You get to customize your oat milk to your liking. Want it thicker and creamier for coffee or baking? Use less water. Want it lighter for cereal or smoothies? Add more water.

You can also add your own flavors—vanilla, cinnamon, maple syrup, or just a pinch of salt—to make the milk taste exactly how you like. I’ve even tried chocolate oat milk once, and it was surprisingly easy!

Fun and Satisfaction

There’s something really satisfying about making your own food from scratch. Plus, once you get the hang of oat milk, you’ll wonder why you ever bought it pre-made. It’s a simple kitchen win that feels like a mini accomplishment every time.

Ingredients and Tools You’ll Need (No Cheesecloth Required)

So, you’re ready to dive into making oat milk but don’t have a cheesecloth? No problem at all! Honestly, when I started, I thought a cheesecloth was some kind of magical kitchen must-have. Turns out, you can totally skip it and still get smooth, creamy oat milk.

Let’s talk about what you actually need to get started, both in terms of ingredients and tools.

Ingredients

1. Oats
The star of the show! For the best results, I highly recommend using rolled oats. They’re easy to blend and produce a nice creamy texture. Steel-cut oats? Not so much. They’re tougher and don’t break down well, which can make your milk grainy or gritty. Quick oats are okay but sometimes make your milk slimier, so I usually stick with rolled oats.

A standard ratio I use is about 1 cup of oats to 4 cups of water—but you can adjust depending on how thick or thin you want your milk.

2. Water
Use clean, cold water. Tap water is usually fine, but if your water is heavily chlorinated or tastes funny, filtered water will give you better results. The water-to-oat ratio matters a lot, too. Too much water means thin milk; too little can be super thick and maybe a bit gloopy.

3. Optional flavorings
This is where you get to make your oat milk uniquely yours. Here are some things I like to add:

  • A pinch of salt (it enhances flavor)
  • A teaspoon of vanilla extract (for sweetness and aroma)
  • A tablespoon of maple syrup or honey (if you want it sweetened)
  • A sprinkle of cinnamon or nutmeg for warmth and spice

None of these are necessary, but they really jazz up the flavor.

Tools (Without a Cheesecloth)

Here’s where most people get stuck, but honestly, you’ve probably got everything you need already.

1. Fine Mesh Strainer
This is my go-to alternative. Most kitchens have one, and it works well to catch most of the oat pulp. The trick is to use a strainer with really fine holes, so you get smoother milk.

2. Nut Milk Bag
If you happen to have one from making almond or cashew milk, perfect! These bags are designed specifically for straining nut and oat milk. They’re reusable and easy to clean, making them a great investment if you plan on making plant milks regularly.

3. Clean Kitchen Towel or Dish Towel
A thin, clean cotton towel works surprisingly well as a strainer. Just make sure it’s freshly washed without detergent residue. Drape it over a bowl, pour your blended oat milk in, and squeeze the liquid out slowly.

4. Clean Cotton Sock
Okay, this sounds weird, but it’s a legit hack when you’re in a pinch. Use a fresh, white cotton sock (no patterns or dyes) as a makeshift nut milk bag. It’s stretchy and squeezes well.

Other Helpful Tools

  • Large bowl to catch the milk when you strain
  • Measuring cups for precise oat and water ratios
  • Blender—a good blender is essential. I use a standard kitchen blender, and it gets the job done perfectly. High speed but short blending time is key to avoid sliminess.

Choosing the Right Oats

This part took me a little experimentation. Rolled oats work best for creamy oat milk, but I noticed quick oats tend to produce a slimier milk if you don’t rinse or soak them well. Steel-cut oats? Nope, they’re too hard and don’t blend smoothly.

So, rolled oats it is! Plus, they’re affordable and easy to find in any grocery store.

Summary

So to recap, here’s your shopping list for making oat milk without a cheesecloth:

  • Rolled oats (1 cup)
  • Clean water (about 4 cups)
  • Optional: vanilla extract, sweetener, salt, cinnamon
  • Tools: blender, fine mesh strainer OR nut milk bag OR clean kitchen towel OR clean cotton sock
  • Large bowl for straining

With these in hand, you’re ready to make your own oat milk magic happen—no cheesecloth required!

Step-by-Step Guide to Making Oat Milk Without a Cheesecloth

Alright, now for the fun part! Making oat milk at home without a cheesecloth is easier than it sounds. I’ll walk you through every step I’ve learned, including some tips to avoid that dreaded slimy texture that sometimes happens with homemade oat milk.

Step 1: Soak Your Oats

Start by measuring 1 cup of rolled oats into a bowl. Pour enough cold water to cover them—usually about 2 cups is good—and let them soak for at least 30 minutes. I’ve even left them overnight in the fridge a few times when I was prepping ahead.

Why soak? Soaking softens the oats and helps release some of the starches, which can otherwise make your oat milk slimy or gloopy. It also makes the oats easier to blend smoothly.

Step 2: Rinse the Soaked Oats

This step is a game-changer. After soaking, pour the oats into a fine mesh strainer and rinse thoroughly with cold water. This helps wash away excess starch on the surface that’s responsible for slime.

At first, I used to skip this, and my oat milk ended up super slimy and not very pleasant. Once I started rinsing, the texture improved dramatically.

Step 3: Blend the Oats and Fresh Water

Now, transfer the rinsed oats into your blender. Add 4 cups of fresh, cold water.

Blend on high for 30 to 45 seconds. That’s it! Blending for longer doesn’t make your milk creamier—it actually releases more starch and makes it slimier.

If you want your milk thicker and creamier, reduce the water to 3 cups. For thinner milk, add more water.

Step 4: Strain the Milk Using Your Chosen Tool

Here’s where the cheesecloth usually comes in, but remember, we’re skipping it.

  • If you have a fine mesh strainer, place it over a large bowl. Pour the blended mixture through, then press gently with a spoon to extract the milk.
  • If using a nut milk bag, pour the blend inside the bag and squeeze gently to get the milk out.
  • With a clean kitchen towel or dish towel, drape it over the bowl, pour the oat mixture on it, then gather the edges and twist/squeeze the towel to strain.
  • Using a clean cotton sock is similar—pour in the blend and squeeze the milk out slowly.

Be patient here—it takes a bit of squeezing, but you’ll get most of the liquid separated from the pulp.

Step 5: Flavor and Store Your Oat Milk

Once strained, pour your fresh oat milk back into a clean jar or bottle. Here’s where you can get creative:

  • Add a pinch of salt to bring out flavor
  • Stir in 1 tsp vanilla extract for sweetness
  • Sweeten with 1 tbsp maple syrup, honey, or agave if you want
  • Add a dash of cinnamon or nutmeg for warmth

Give it a good stir or shake.

Store your oat milk in the fridge and use within 3 to 5 days. Remember to shake before every use, as it naturally separates.

Bonus Tips to Avoid Slimy Oat Milk

  • Don’t soak oats too long—30 minutes to 1 hour is usually enough. Longer soaking can release more starch and slime.
  • Rinse the oats well after soaking.
  • Blend on high but only for 30-45 seconds. Less is more here.
  • Strain carefully and thoroughly.
  • Use rolled oats, not quick or steel-cut oats for best texture.

What to Do With Leftover Oat Pulp?

Don’t throw it away! The leftover pulp is full of fiber and nutrients. I add mine to smoothies, muffins, pancakes, or oatmeal for extra texture and nutrition.

Making oat milk without a cheesecloth really isn’t hard once you get the hang of it. The key is soaking, rinsing, and straining carefully, and you’ll have creamy, fresh oat milk in no time.

Troubleshooting Common Issues

Making oat milk at home is pretty straightforward, but I’ll be honest—when I first started, I ran into a few bumps. If you’re having trouble, don’t sweat it! Here’s a rundown of common problems and how to fix them based on my own experience.

Problem 1: Oat Milk Is Too Slimy or Gloopy

Oh man, the dreaded slime! That sticky, gooey texture can be a turnoff if you’re expecting smooth milk.

Why it happens: Oats release starch when soaked and blended too long, which causes the slime.

Fixes:

  • Rinse soaked oats really well before blending to wash off excess starch. This made a huge difference for me.
  • Don’t soak oats too long. Thirty minutes to an hour is enough. Soaking overnight can sometimes release too much starch.
  • Keep blending short. Blend for no more than 45 seconds. Over-blending extracts more starch and makes the milk slimier.
  • Adjust water ratio. Using more water can dilute the starch and reduce slime.

Problem 2: Gritty or Chalky Texture

If your oat milk feels grainy or chalky, it usually means the pulp isn’t strained well enough.

Fixes:

  • Use a finer strainer or a nut milk bag to catch smaller bits of oat pulp.
  • Strain slowly and press or squeeze gently to get as much liquid as possible without pulp.
  • If you’re using a kitchen towel or sock, make sure it’s thin enough to strain finely.

Problem 3: Milk Separates Quickly

If you notice your oat milk separates in the fridge and looks watery on top and thicker at the bottom, don’t panic—that’s totally normal!

What to do:

  • Just give it a good shake before each use.
  • Homemade oat milk doesn’t contain stabilizers like store-bought brands, so separation is natural.
  • If you want it smoother, try blending again briefly before using.

Problem 4: Oat Milk Spoils Quickly

Since homemade oat milk doesn’t have preservatives, it can go bad faster.

Tips to keep it fresh:

  • Store it in a clean, airtight container in the fridge.
  • Use within 3-5 days.
  • Smell and taste before use. If it smells sour or off, toss it.
  • Freeze leftover oat milk in ice cube trays for use in smoothies.

Problem 5: What to Do With Leftover Oat Pulp

Don’t toss that pulp! It’s full of fiber and nutrition.

Ways to use it:

  • Add to smoothies for extra thickness and fiber.
  • Mix into pancake or muffin batter.
  • Stir into oatmeal or yogurt bowls.
  • Use as a base for homemade granola bars.
  • Compost it if you don’t want to eat it.

Troubleshooting was definitely part of my oat milk journey. But with these tips, you’ll be able to fix common issues and enjoy smooth, creamy oat milk every time.

Flavoring and Using Your Homemade Oat Milk

Making oat milk yourself means you’re in control—not just of the ingredients but also of the flavor. I love that because I can tweak it to suit whatever I’m making or craving.

Simple Flavor Boosters to Try

Here are some of my favorite ways to add a little something extra to homemade oat milk:

  • Vanilla extract: Just a teaspoon gives your oat milk a warm, sweet aroma. Perfect for coffee, cereal, or smoothies.
  • Maple syrup or honey: If you like your milk sweet, a tablespoon of natural sweetener works wonders. Maple syrup is my fave for that subtle caramel note.
  • Cinnamon or nutmeg: A pinch of warm spice can transform plain oat milk into something cozy and delicious.
  • Salt: Sounds weird, but a tiny pinch of salt balances out sweetness and rounds the flavors.
  • Cocoa powder: For a quick chocolate oat milk, add a teaspoon of unsweetened cocoa powder and sweeten to taste.

Feel free to experiment—add your favorite flavors bit by bit until you find your perfect combo!

How I Use Homemade Oat Milk Daily

Making oat milk at home has changed how I cook and drink in small but meaningful ways:

  • Coffee and lattes: Oat milk froths well if you heat it gently and whisk or use a handheld frother. It’s my go-to for homemade lattes because it’s creamy and adds a subtle sweetness without overpowering espresso.
  • Smoothies: I use oat milk as a creamy base instead of juice or water. It adds a mild oat flavor and smooth texture that pairs well with fruits and greens.
  • Cereal and oatmeal: Pour oat milk over cold cereal or use it as the cooking liquid for oatmeal to keep the oat flavor consistent.
  • Baking: Oat milk works great as a dairy substitute in pancakes, muffins, cookies, and cakes. It adds moisture without heaviness.
  • Cooking: Use oat milk in soups, sauces, or creamy pasta dishes when you want a plant-based option that won’t separate easily.

Tips for Frothing Oat Milk Without Special Equipment

If you don’t have a fancy milk frother, don’t worry! I’ve used some simple hacks that work surprisingly well:

  • Hand whisk: Heat your oat milk on the stove until warm (not boiling), then whisk vigorously by hand for about 30 seconds. You’ll get some foam, enough for coffee topping.
  • Jar shake: Pour warm oat milk into a jar with a lid and shake vigorously for 30 seconds to create froth.
  • Blender: Blend warm oat milk on high for a few seconds. This also incorporates air and creates a light foam.

Final Thoughts on Flavor

One of my favorite parts about making oat milk at home is that I can control how strong or subtle the oat flavor is. If you want a more neutral taste, just use more water when blending. If you want that distinct oat creaminess, go a bit thicker and add vanilla or cinnamon.

The beauty of homemade oat milk is you get to customize it to your taste and your needs, which makes every sip satisfying.

Conclusion

Making oat milk at home without a cheesecloth is honestly easier than it sounds. With just a few simple ingredients and some clever kitchen hacks, you can whip up fresh, creamy oat milk that’s free from additives and tailored exactly to your taste. Whether you’re after a smooth latte companion, a smoothie base, or just a wholesome milk alternative for your cereal, homemade oat milk checks all the boxes.

Remember, soaking and rinsing your oats well, blending for the right amount of time, and choosing the right straining tool are the keys to perfect oat milk. And don’t forget to use that leftover pulp in recipes—waste not, want not!

Give it a try, experiment with flavors, and make oat milk your own. I’d love to hear how your oat milk adventures go—drop a comment below with your tips, tricks, or questions. Happy blending!

Leave a Comment